Conquer the Trail - Skills come with practice
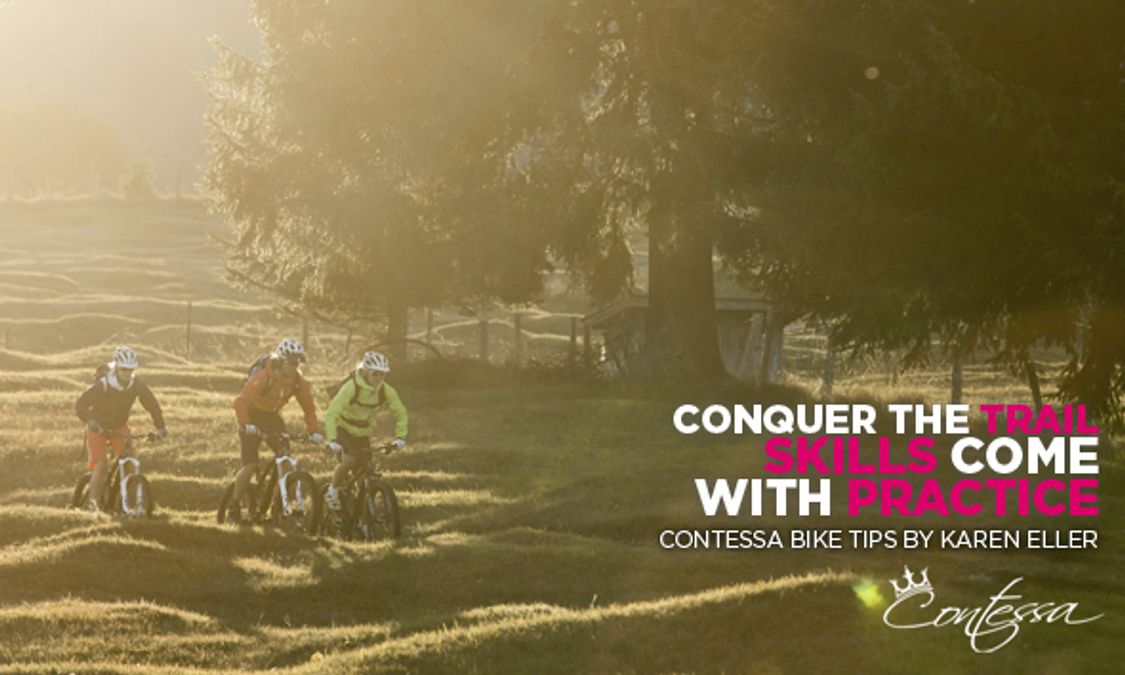
"I can’t do it!" Is this phrase familiar to you? There are always girls who drop the subject of biking before even starting. Bike touring commonly refers to nice rides with decent amounts of elevation gain. However, it is not uncommon to see the girls that go up come back down via asphalt. Once we undertake the most demanding tours, we find ourselves suddenly on technical single trails and there, its most often the bike that has the most work to do. This isn’t great for the people waiting for us below, or for ourselves. For most, however, these single trails are the icing on the cake. When mastering the downhills that are not even imaginable in our dreams, we gain confidence and happiness. In this article you will find some important tips for improving your technique, so as to gain the maximum amount of confidence on your bike.
Level I: The Basics
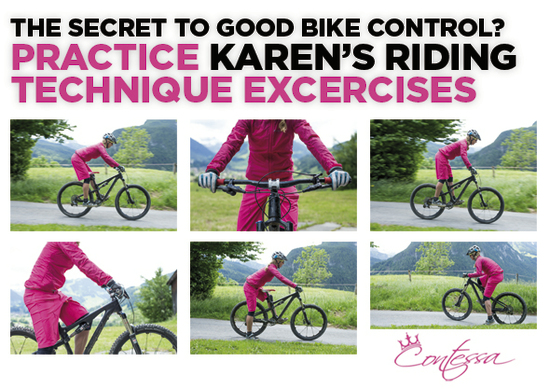
The first thing that you will notice is that mountain biking is completely different than traditional biking. You therefore have to master the basics: braking, shifting gears, balancing, and having a good and consistent riding position. If you do not have these basics, then you will always make biking more difficult that it should be. To train, you need not go far: the local parking lot is enough. Have confidence and try new things. Gradually, you will improve your skills and will develop a more comfortable feel on the bike.
Changing gears properly:
Even though it looks silly, having the right technique to shift gears can save you a lot of strength- and money. This prevents pinching or breaking of the chain or damaging the derailleur. Each and every rider should know their shifting system by heart. All bikes are equipped with different systems. You should be able to use yours with your eyes closed.
What never changes is the rear derailleur, which is controlled from the right lever. The front derailleur is controlled with the left lever, and is located by the crankset. In general, mountain bikes have three rings in front, and a nine speed cassette at the back. When you ride, changing gears must be anticipated. Often people change speeds once they are already on the rise. Anticipating means changing speed in time, that is to say, changing into a favorable speed before the climb. You should always be able to ride with a medium strength. Warning: the chain must travel a greater distance when you want to change rings up front. Due to this, you should always have your chain on the smallest chainring. You can always change speeds on the rear cassette during the climb.
When you shift, quickly reduce the pressure on the pedals: the chain will almost move by itself to the next gear. Avoid combinations of small-small or large-large. The more the chain has to move diagonally, the more it will wear out.
Learn how to stop properly
In order to not go over the handlebars, you need to get used to your brakes in different situations. Disc brakes are very effective, and in some situations can work surprisingly well. The front brake has about 70% of the braking force, which is why it is used quite often. This is not too much of a problem on dry ground and with good grip, but if the ground is wet or if you are on the slippery gravel, then you are better off balancing your braking between the front and the rear. If you only use your front brake, your front wheel will skid, leading to loss of control and falling. During
full braking, it is also important to let go of the brakes at the right time, for instance when rear wheel locks and starts to skid, for example during a bend on a gravel road. Remember that your MTB is stabilized when it rolls, not when it skids.
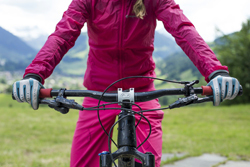
Position of the fingers on the handlebars: only use two fingers maximum when braking, preferably the index and middle fingers. When going downhill, it is best to keep just one finger on the brake lever, and the rest firmly gripping the handlebars.
The brake levers should be positioned on the handlebars at an angle that is in line with your forearms. This saves your strength, and will help reduce arm pump.
The brake levers are adjusted using an Allen key. Women's hands are often smaller and have less strength than men’s hands. With shorter fingers, the distance between the handlebars and brake levers should be shorter as well. This distance, like the distance between the brake lever in the open position and the lever in the locked position, should be optimized depending on the rider and the model of the brakes. The adjustment mechanism is usually found on the lever.
You save a lot of energy by gripping the brake levers on their outer end. Its best to shift your brakes out a couple of inches to make this easier.
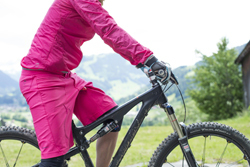
For maximum efficiency, put your weight behind the saddle when you brake. This also helps to avoid going over the handlebars.
Your position on the bike
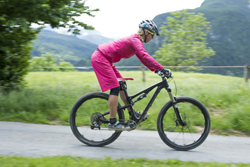
Good posture is essential to developing proper technique. In the basic position, the feet are placed horizontally on the pedals. The knees are slightly bent and the leg muscles are relaxed. Do not tighten your legs. The center of gravity of your body is in the middle, above the saddle or at the bottom bracket. The muscles of the arms, shoulders and neck should be relaxed. Mountain bikers often tend to keep their elbows in and to flex their muscles excessively. This creates tension in the shoulders and neck and can even lead to headaches. Tuck in the navel and keep your back straight! From this position, your body’s center of gravity automatically adjusts to the contours of the ground and slope.
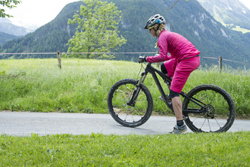
Balance
Those who can keep their balance on the bike for a long time will also find it easier to navigate through tough, technical sections. The more you manage to keep your balance, the longer you will have to choose the most optimal line. And in sharp turns, you will have a much better chance of staying on your bike.
The best place to train your balance is on a good flat parking lot. Ride your bike with pedals in a horizontal fashion. Place your supporting foot on the front pedal, slightly higher than the rear pedal and put two fingers on the brake levers, ready to brake. Your body’s center of gravity is a bit in front of the bottom bracket. Your shoulders are relaxed over the handlebars. Once in this position, apply pressure on the front foot and move very slowly, using brakes and the pressure applied to the pedals until you are in a stationary position. At the beginning, it is better to practice without clip pedals, but rather with just your feet sitting atop the pedals. If you lose your balance, release the brakes and pedal just a little bit. The bike will move forward, and you won’t fall. Practice this at a medium speed.
You can also increase your balance by training your eyes. Keep your eyes fixed on a stationary point in the distance, and you will be able to balance easily. Then look at your front wheel: you will immediately notice how much harder it is to stay balanced. This applies when riding in an anticipative fashion. It is always better to focus on where you are going, not specifically on a root or a rock just in front of you. This is valuable especially on tight and exposed trails.
Mount and dismount properly
Mounting and dismounting? Everyone can do this! This may seem easy, but when the terrain becomes more technical and fear kicks in, this can get tricky. Believe me, in my classes I've seen all sorts of techniques for mounting and dismounting.
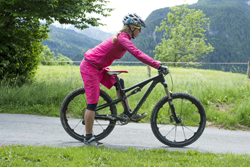 If you decide during a descent that you would like to put a foot down and to push, you are better off getting completely off of the bike. Pushing the bike while it is in between your legs is an easy way to get hurt. And if you do decide to get back on your bike to try the descent from this position, it will be very difficult, if not impossible. Hop back on the bike from the rear of the bicycle, and you’ll be good to go. Put your front foot on the pedal at a position that is slightly higher than the rear foot, and pull back on the brake levers. As soon as you let go of the brakes, the bike will move forward and you can position yourself accordingly.
 Riding your bike up steep climbs is no easy task by any means. However, there are a few tips that can help get you well on your way to climbing success. Position your bike slightly perpendicular to the slope to make it less steep. Do not choose the smallest gear, otherwise you will not be able to start. Sit on the edge of the seat with both hands on the handlebars, brakes locked. Your supporting foot should be on the forward pedal, placed slightly upwards. Release the brakes as soon as you press the pedal. Then look straight ahead and lower elbows. Your weight should be over your front wheel, keeping it firmly on the ground.
Council: Train yourself to get on and off your bike in a parking lot until your actions become automatic.

Karen Eller
Episode 1: How to choose the right bike
Episode 2: Right Preparation for the season
Episode 3: How do I set up my bike correctly?
Episode 4: What equipment do I really need?